
Yes I know , you are probably saying "that looks like silver embossing to me" Yes you are right. I did many samples using all the different powders and this one took the best photo.
The next style of masking is one of my favourites. It always looks so difficult but the consensus was that it was the easiest and made a really WOW card.
I ripped some scrap paper in half to make two ragged edges. Then this is placed on the card leaving an area to sponge. The sponging in this technique uses a sponge rather than sponge daubers. I still like to use three colours for the first layer. Then I randomly stamp a few shapes or writing in either Early Expresso or one of the sponged colours, depending on what effect you are after. Then the scrap paper is removed and WOW!
This is called Reverse Masking.


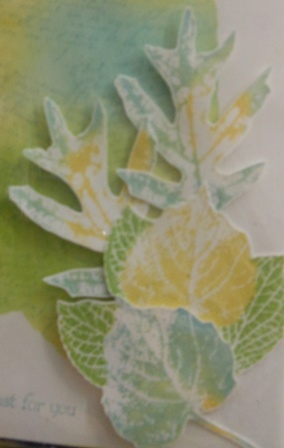
This one here is a mixture of Reverse masking and masking. If you look closely you will see the leaves have been masked and then cut out. I got the background effect by ripping a hole in a piece of paper and then applying the ink the same as the one above.

Lastly we did this little cutie. I love this style of masking but it can, be a little frustrating to get the mask just right. The secret is to use very thin paper, something like post it notes, and the more you use it the better, as it makes the mask paper thinner.
Another tip is to cut the mask a sliver smaller than the image so that you do not get the white halo around it.

So what do you recon? Going to have a go at masking? Go on have a go and let me know how you went, I think you will love it.
No comments:
Post a Comment
I always love reading comments, so thank you for commenting below.